Curtain wall / mullion corners in Revit
Curtain walls are one of the first major hurdles users face when creating simple projects in Revit Architecture for the first time. An example of one of the problems you could face would be that when you create joining curtain walls through an angle, Revit does not automatically generate the best design option for you. Instead it will give you a default option as seen in the image below.
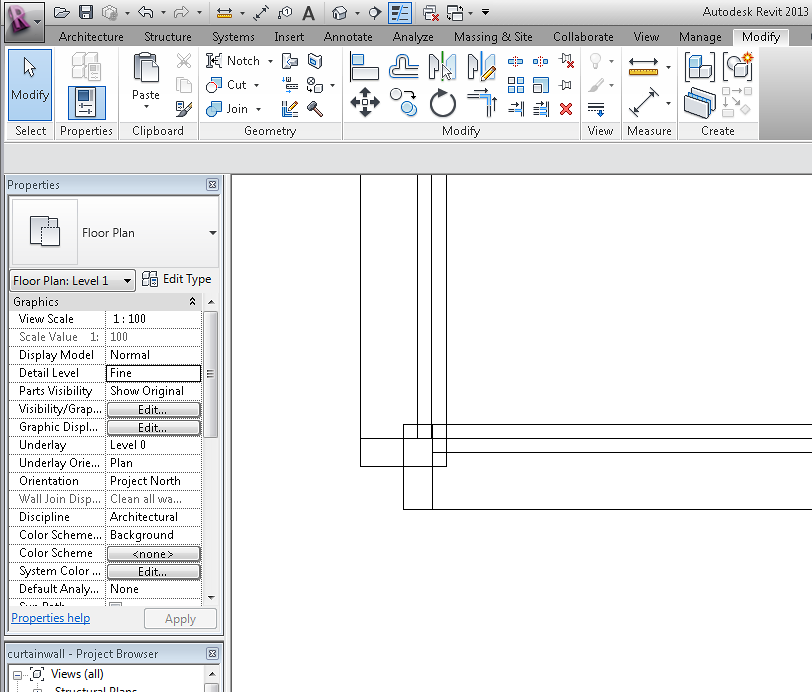
In the above image you can see that Revit has automatically generated a faulty construction. Instead of creating a corner mullion / join, it has simply added the 2 walls together with the standard curtain wall endings, resulting in a clash. I assume the reason for this is to allow the user the freedom to design and modify the join as they feel suitable. I will now demonstrate the very simple solution to this problem.
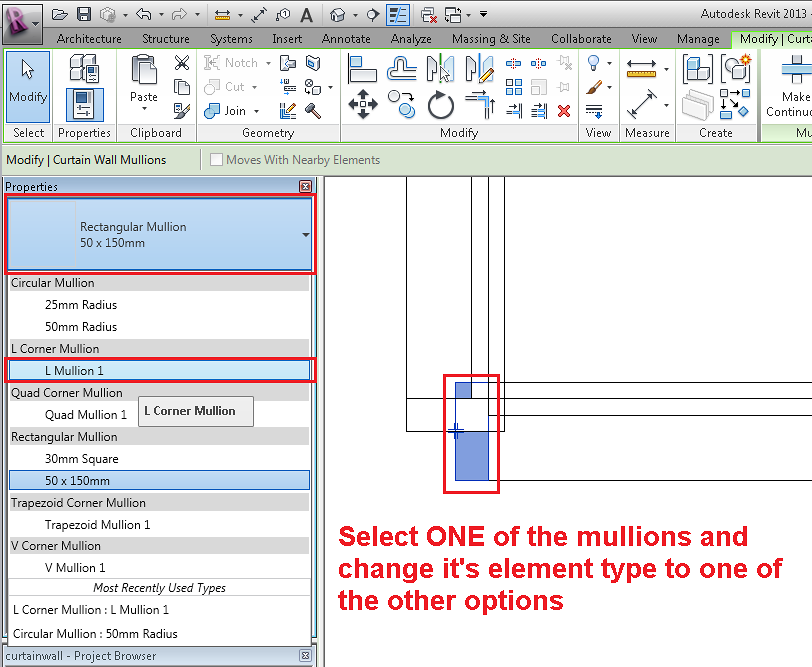
Following the instructions from the image above, select one of the corner mullions, at this point lets assume it doesn’t matter which one you select (certain join options work in different ways). Once you have one selected, you can click in the properties dialogue and change the element type from the drop down menu. As you can see there are various options which you can choose from; play around with them and find out what fits your design. Once you have decided, click “apply”.
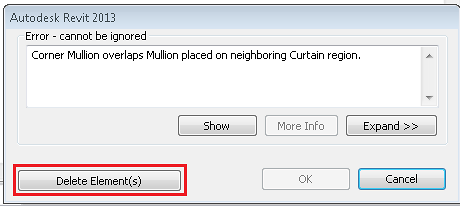
You will receive an error from message as shown in the image above. It is just warning you that at present the new corner mullion is overlapping the neighbouring curtain region. Simply click “Delete Element(s)”. You have now removed the other mullion which was automatically generated from Revit and replaced it with your new corner connecting mullion. (Note: You will have to change the mullion type on each level)

In a plan view, you will now see that the join is a lot cleaner and the clash has been solved. As I said above, there are a lot of different design options, so if the “L join” doesn’t fit your design then play around and find one that does. You can always create a custom family if you don’t find what you are looking for!
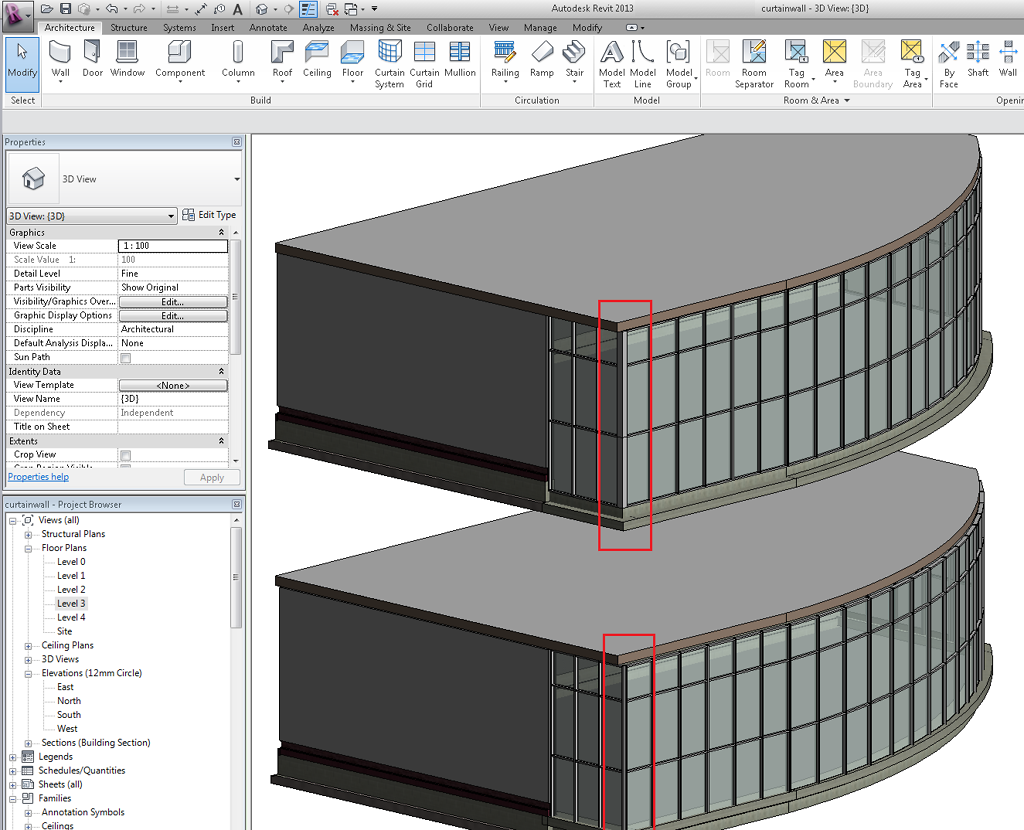
Finally shown in a 3D view, the new mullions (top) and the original model (bottom) generated by Revit. As you can see the join has been cornered off and no longer clashes with the joining wall. This is a very simple design option in Revit, but it is very important to understand the basics of curtain walls before you try and create large projects with custom systems. If you are trying to create curved curtain walls but it is showing up as a straight wall in 3D view, make sure you have defined rules and standards for vertical grids on the walls, alternatively, use the “storefront” style of wall which is already pre-defined.


Không có nhận xét nào:
Đăng nhận xét